Saturday, March 12, 2011

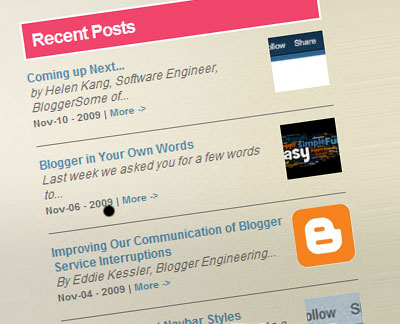
How to Add Recent Posts with Slide Show

Hi, friends! Previously, I've posted about How to Make Headline New In Blog, Now I will posted about How to Add Recent Posts with Slide Show. This trick will show some recent posts of your blog with cool and stylish slide show. You can view the demo HERE. So, do you want to add recent posts with slide show into your blog? OK, I will share the trick. Just follow the steps below.

1. Log in to your blogger account
2. Go to Design --> Page Elements --> Add Gadget
3. Choose HTML/Java Script
4. Copy the code below, and paste on it

<script src="http://ajax.googleapis.com/ajax/libs/jquery/1.3.2/jquery.min.js" type="text/javascript"></script>
<style type="text/css" media="screen">
<!--

#spylist {
overflow:hidden;
margin-top:5px;
padding:0px 0px;
height:350px;
}
#spylist ul{
width:220px;
overflow:hidden;
list-style-type: none;
padding: 0px 0px;
margin:0px 0px;
}
#spylist li {
width:208px;
padding: 5px 5px;
margin:0px 0px 5px 0px;
list-style-type:none;
float:none;
height:70px;
overflow: hidden;
background:#fff url(http://i879.photobucket.com/albums/ab351/bloggerblogimage/blogger/post.jpg) repeat-x;
border:1px solid #ddd;
}

#spylist li a {
text-decoration:none;
color:#4B545B;
font-size:11px;
height:18px;
overflow:hidden;
margin:0px 0px;
padding:0px 0px 2px 0px;
}
#spylist li img {
float:left;
margin-right:5px;
background:#EFEFEF;
border:0;
}
.spydate{
overflow:hidden;
font-size:10px;
color:#0284C2;
padding:2px 0px;
margin:1px 0px 0px 0px;
height:15px;
font-family:Tahoma,Arial,verdana, sans-serif;
}

.spycomment{
overflow:hidden;
font-family:Tahoma,Arial,verdana, sans-serif;
font-size:10px;
color:#262B2F;
padding:0px 0px;
margin:0px 0px;
}

-->
</style>

<script language='JavaScript'>

imgr = new Array();

imgr[0] = "http://i43.tinypic.com/orpg0m.jpg";

imgr[1] = "http://i43.tinypic.com/orpg0m.jpg";

imgr[2] = "http://i43.tinypic.com/orpg0m.jpg";

imgr[3] = "http://i43.tinypic.com/orpg0m.jpg";

imgr[4] = "http://i43.tinypic.com/orpg0m.jpg";
showRandomImg = true;

boxwidth = 255;

cellspacing = 6;

borderColor = "#232c35";

bgTD = "#000000";

thumbwidth = 70;

thumbheight = 70;

fntsize = 12;

acolor = "#666";

aBold = true;

icon = " ";

text = "comments";

showPostDate = true;

summaryPost = 40;

summaryFontsize = 10;

summaryColor = "#666";

icon2 = " ";

numposts = 10;

home_page = "http://full-tricks.blogspot.com/";

limitspy=4
intervalspy=4000

</script>

<div id="spylist">
<script src='http://scriptabufarhan.googlecode.com/svn/trunk/recentpostthumbspy-min.js' type='text/javascript'></script>
</div>

=> Change full-tricks.blogspot.com with your blog address
5. Then, just click Save

Easy Way to Get Free 25 Backlinks Every Day!

PageRank is the most important thing of SEO. PR can be built with backlinks. But, maybe hard to get many unique backlinks. So, in this post, I will share to you about Easy Way to Get Free 25 Backlinks Every Day! Maybe, it's  impossible. But, it's real. You can get many backlinks in Social Monkee. So, join with Social Monkee now! Just click the picture below, and just one step to get many backlinks!

Submit your  content Every Day to 25 social  bookmarking sites, all on unique  C class IPs... FREE.

Social Monkee promise can submit to social bookmarking sites automatically with easily. Firstly, you have to sign up. It's very easy, just fill the form on the home page.

Then if you've finished, click on the "Submit Form", and click verification link in your email. And your account actived.

How to Get Free Backlinks?

To get free backlinks, there are 2 methods. The first is using Mozilla Firefox Add-ons. And the second method is manually in your dashboard account.

Now, we will learn get free backlinks manually in the dashboard account. Follow the steps below.

1. Log in to your Social Monkee account
2. Click on the "Download Firefox Plugin / Submit to sites"
3. Then fill the form with the article that you want to submit
URL : Fill with the article address that you want to submit, for example :
http://full-tricks.blogspot.com/2011/03/how-to-add-preloader-status-in-blog.html
Title 1 : Fill with the article title, for example : How to Add Preloader Status In Blog
Title 2 : Fill with title variations, for example : Add Preloader Status In Blog
Title 3 : Fill with other title variations, for example : How to Add Preloader Status
Description 1 : Fill with snippet of the article
Description 2 : Fill with snippet variations of the article
Description 3 : Fill with other snippet variations of the article
Tags 1 : Fill with the article tags, for example : preloader status, blogger tricks, blogger hacks
Tags 2 : Fill with other the article tags, for example : blogspot tricks, blogspot hacks, preloader trick
Tags 3 : Fill with other the article tags varitations, for example : blog tricks, blog hacks, preloader hacks
Category : Choose the article category
4. If you finish with the form, click "Submit"

Check the reports

If you want to know, your article link has been submitted, you can click "Reports" tab. Then at the bottom, see the table of your links which has been submitted. Click "View Report"


Then, you can see the list of links for your article. For example, How to Add Preloader Status In Blog


Great friend! You have submitted to 25 DoFollow Social Bookmarking! So, it's easy way to get free 25 backlinks every day!

Friday, March 11, 2011

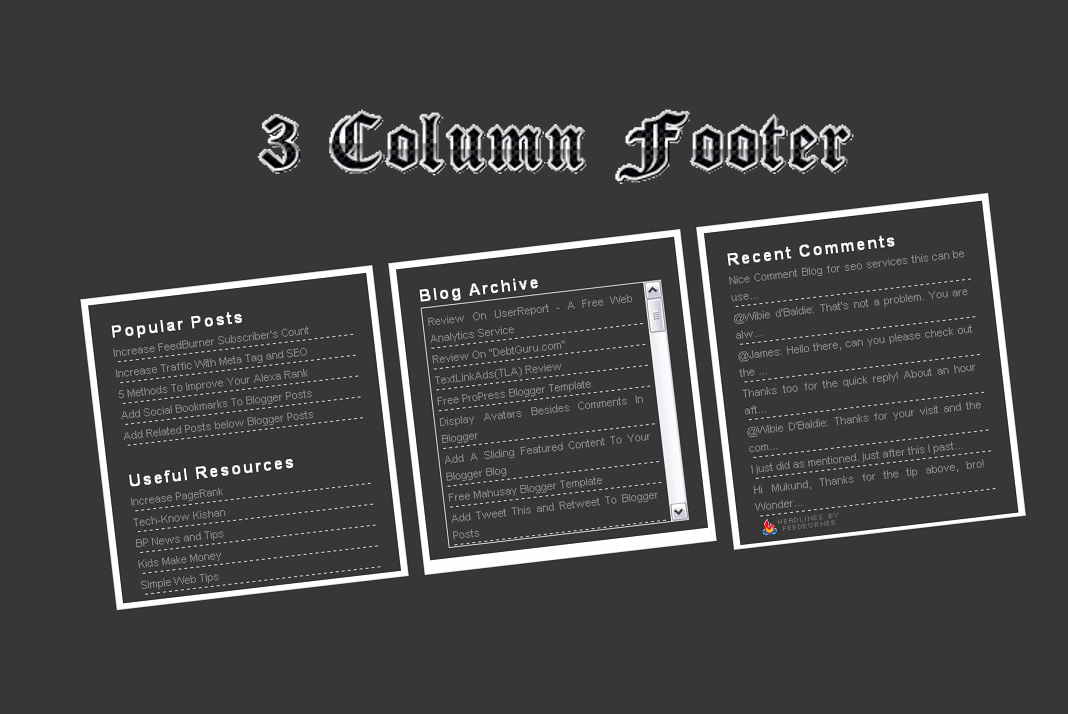
How to Make Three Column Footer In Blog

Maybe, you ever see three colum footer in blog. With this style, you can add more widgets. Usually this column filled with followers widget (Google Friend Connect), recent posts, recent comments, or Ads. But you can fill with other widgets. Before you make three column footer in blog, I recommend you to backup your template first, because we will make some changes. Now, if you want to know how to make three column footer in blog, just follow the steps below.
1. Log in to your blogger account
2. Go to Design --> Edit HTML
3. Copy the code below, and paste above ]]></b:skin>
/* -----   LOWER SECTION   ----- */
#lower {
       margin:auto;
       padding: 0px 0px 10px 0px;
       width: 100%;
       background:#333434;
}
#lower-wrapper {
       margin:auto;
       padding: 20px 0px 20px 0px;
       width: 960px;
}
#lowerbar-wrapper {
     border:1px solid #DEDEDE;
       background:#fff;
       float: left;
       margin: 0px 5px auto;
       padding-bottom: 20px;
       width: 32%;
       text-align: justify;
       font-size:100%;
       line-height: 1.6em;
       word-wrap: break-word;
       overflow: hidden;
}
       .lowerbar {margin: 0; padding: 0;}
       .lowerbar .widget {margin: 0; padding: 10px 20px 0px 20px;}
.lowerbar h2 {
      margin: 0px 0px 10px 0px;
       padding: 3px 0px 3px 0px;
       text-align: left;
       color:#0084ce;
        text-transform:uppercase;
      font: bold 14px Arial, Tahoma, Verdana;
       border-bottom:3px solid #0084ce;
}
.lowerbar ul {
      margin: 0px 0px 0px 0px;
      padding: 0px 0px 0px 0px;
      list-style-type: none;
}
.lowerbar li {
      margin: 0px 0px 2px 0px;
      padding: 0px 0px 1px 0px;
      border-bottom: 1px dotted #ccc;
}
=> Change the background color of this widget
=> Adjust this width value in accordance with the width of your blog.
=> That are the background colour and width of the three columns where the widgets are added.
=> Change the color of the title
=> Change the font size and family
=> Change the thickness, style and colour of the border that appears at the bottom of the title
=> Change the size, style and colour of the border that appears below links.
4. Then copy the code below, and paste above </body>
<div id='lower'>
<div id='lower-wrapper'>
<div id='lowerbar-wrapper'>
<b:section class='lowerbar' id='lowerbar1' preferred='yes'>
</b:section>
</div>
<div id='lowerbar-wrapper'>
<b:section class='lowerbar' id='lowerbar2' preferred='yes'>
</b:section>
</div>
<div id='lowerbar-wrapper'>
<b:section class='lowerbar' id='lowerbar3' preferred='yes'>
</b:section>
</div>
<div style='clear: both;'/>
</div> </div>
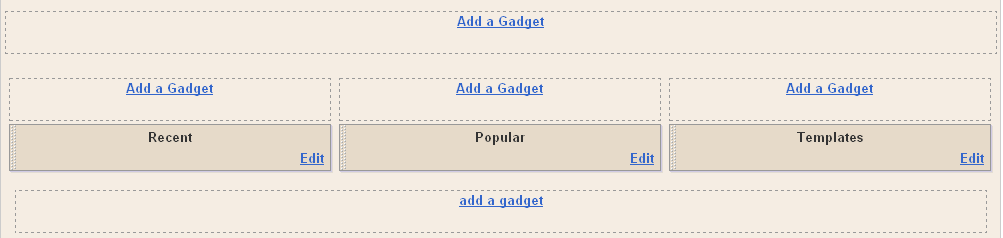
5. Save your template now. Then check in the Design --> Page Elements

Thursday, March 10, 2011

How to Add Preloader Status in Blog

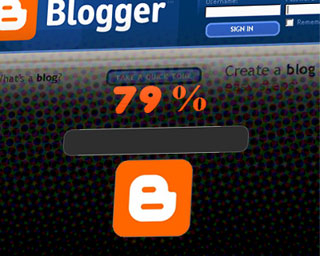
Previously, I've posted about How To Add Page Loading Status Image In Blog. But, many people said "It doesn't work." or "The image cannot stop". So, I will post the almost the same trick, that's How to Add Preloader Status in Blog. It's very attractive I think. Why? Because, when you open the blog, you can find a loading status with the animation. Still curious? View the demo HERE. And, if you want to know How to Add Preloader Status in Blog, you can follow the steps below.

1. Log in to your blogger account
2. Go to Design --> Edit HTML
3. Copy the code below, and paste above </head>
<script src='http://code.jquery.com/jquery-1.5.min.js' type='text/javascript'/>
<script src='http://blogger-loader.googlecode.com/files/queryLoaderpre.js' type='text/javascript'/>
4. Still on the same page, find </body> and add the code below above </body>
<script>
    QueryLoader.selectorPreload = &quot;body&quot;;
    QueryLoader.init();
</script>
5. And the last, find ]]></b:skin>, and copy the code below, then paste above ]]></b:skin>
.QOverlay {
    background-color: #000000;
    z-index: 9999;
}

.QLoader {
    background-color: #CCCCCC;
    height: 1px;
}

.QAmt {
    color:#FF530D;
    font-size:50px;
    font-weight:bold;
    line-height:50px;
    height:50px;
    width:100px;
    margin:-60px 0 0 -50px;
}
Customize :
=> #000000 is the background color, you can change the code in here
=> #CCCCCC is the loading bar color
=> #FF530D is the loading percentage (number) font color
6. Now, you can click  Save Template

Wednesday, March 9, 2011

How to Add Auto Refresh In Blog

The function of this trick is to refresh our blog every some minutes. What for? Because, if we refresh the blog, we can see the blog update. Now, if you want to know how to add auto refresh in blog, you can follow the steps below.

1. Log in to your blogger account
2. Go to Design --> Edit HTML
3. Copy the code below, and paste under </head>
<meta content='300' http-equiv='refresh'/>
=> 300 means, the blog will refresh every 300 seconds

4. Save it now.

How to Remove Blogger Navbar

Usually, if we're using original blogger template, our blog will added blogger navbar automatically. But, many bloggers instead want to remove blogger navbar. The reason are it looks bad or not really needed. So, they want to remove blogger navbar. But, how to remove blogger navbar. You can follow the easy steps below.

1. Log in to your blogger account
2. Go to Design --> Edit HTML
3. Copy the code below, and paste above ]]></b:skin>
/* CSS to hide navigation bar */

#navbar {
height:10px;
visibility:hidden;
display:none;
}
4. Save your template.

NOTE : This trick only a knowledge! Because if you want to remove blogger navbar, that's break the blogger TOS (Terms of Service)

Saturday, March 5, 2011

How to Add Horizontal Menu for Blogger

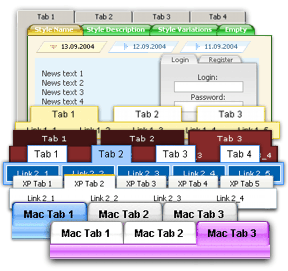
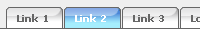
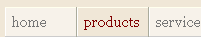
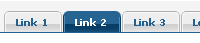
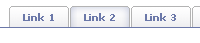
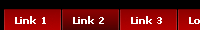
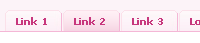
Previously, I've posted about How To Make Vertical Navigations Menu With CSS, now I will posted about How to Add Horizontal Menu for Blogger. Actually the steps are same, the difference only in style. This horizontal menu is very attractive with fresh CSS design. I give you 10 choice, so you can choose your horizontal menu. Before I will gve you the code, I will tell you the steps.

1. Log in to your blogger account
2. Go to Design --> Page Elements --> Add Gadget
3. Then, choose HTML/Java Script
4. Copy the code under the horizontal menu picture and paste on it. If you want to change the links, you can edit the code like this
<li><a href="#"><span>Link 1</span></a></li>
<li><a href="#"><span>Link 2</span></a></li>
<li><a href="#"><span>Link 3</span></a></li>
<li><a href="#"><span>Link 4</span></a></li>
<li><a href="#"><span>Link 5</span></a></li>
<li><a href="#"><span>Link 6</span></a></li>
<li><a href="#"><span>Link 7</span></a></li>
for example :
<li><a href="http://full-tricks.blogspot.com/"><span>Home</span></a></li>
5. Save now. Below, are example of horizontal menu for blogger :


OK, that's all friend. Hopefully useful... ^_^

Friday, March 4, 2011

Show The Total of Followers In RSS, Twitter, and Facebook

This widget is very useful. The function of this widget is to show the total of followers in RSS, Twitter, and Facebook. This widget is very simple. Even, this widget doesn't use Java Script. Just use CSS and HTML. But, if you're using this widget, You've to update this widget manually. So, you have to be diligent to update the total of followers in RSS, Twitter, and Facebook. So, if you want to show the total of followers in RSS, Twitter, and Facebook in your blog, just follow the steps below.

1. Log in to your blogger account
2. Go to Design --> Page Elements --> Add Gadget
3. Choose HTML/Java Script
4. Copy the code below, and paste on the place.
<style>
.rss-mbt {
    background: url(http://1.bp.blogspot.com/_7wsQzULWIwo/S7wwAxlnAsI/
AAAAAAAAC_g/9s74YaAwpls/s800/RSS1.png) no-repeat;
    height: 64px;
    padding: 0px 20px 0px 80px;
    margin-top: 20px;
}
.twitter-mbt {
    background: url(http://3.bp.blogspot.com/_7wsQzULWIwo/S7wv1yUhrdI/
AAAAAAAAC_Y/_yw-vTwlc7g/s800/TWITTER1.png) no-repeat;
    height: 64px;
    padding: 0px 20px 0px 80px;
    margin-top: 20px;
}
.facebook-mbt {
    background: url(https://blogger.googleusercontent.com/img/b/R29vZ2xl/AVvXsEjnoMmAgQ5EGqFE0XRjMCqwD9c_xXSw3zJCvl_YI7yF58A9WcOGlLMNKSAdOILrpk5f_uCI4q6YEKVwz3i4V61WciWn9RzgFmMZ9K6-klIiTVw-EdcRxBonXNYQ1L6lGsQ8CNp5-jcWhb4/s800/FACEBOOK1.png) no-repeat;
    height: 64px;
    padding: 0px 20px 0px 80px;
    margin-top: 20px;
}
.follower-rss, .follower-twitter, .follower-facebook {
    font-family: Georgia,  sans-serif, Times;
    font-size: 1.1em;
        font-style:italic;
        color:#289728;
}
.follower-rss span {
    font-size: 1.9em;
    font-weight: bold;
        font-style:italic;
        color:#FFB93C;  
}
.follower-twitter span {
    font-size: 1.9em;
    font-weight: bold;
        font-style:italic;
        color:#6DB6E6;  
}
.follower-facebook span {
    font-size: 1.9em;
    font-weight: bold;
        font-style:italic;
        color:#3889BA;  
}
</style>
<div class="rss-mbt">
<div class="follower-rss"> <span>515</span> loyal readers
</div>
<a href="YOUR RSS FEED URL" rel="nofollow">RSS feed</a>
| <a href="YOUR RSS EMAIL FEED URL" target="_blank" rel="nofollow">E-mail</a>
</div>
<div class="twitter-mbt"><div class="follower-twitter"><span>1058</span> followers</div>                          
<a href="YOUR TWITTER URL" target="_blank" rel="nofollow" title="I definitely follow you back">Follow us on Twitter!</a>
</div>                    
<div class="facebook-mbt">                      
<div class="follower-facebook"><span>260</span> followers                            </div>                          
<a href="YOUR FACEBOOK FAN PAGE URL" target="_blank" rel="nofollow">Join us on Facebook!</a>
</div>
=> You have to update the number of the followers
5. Save now

How to Add Flying Twitter Bird to Follow The Cursor In Blog

twitter icon
Do you have a twitter account? If you have, you can mix it in your blog. But, usually the widget to follow on the twitter only an image. So, in this post, I will make a difference. The twitter image is a bird that can fly and follow the cursor. It's very wonderful. The steps to add flying twitter bird in blog is very easy. You just need 5 steps! Add flying twtter bird in blog now!

1. Log in to your blogger account
2. Go to Design --> Page Elements --> Add Gadget
3. Choose "HTML/Java Script"
4. Copy the code below, and paste on the place
<script type="text/javascript" src="http://techgyo.com/wp-content/FlyingTwitbird/tripleflap.js"></script>
<script type="text/javascript">
var birdSprite="http://techgyo.com/wp-content/FlyingTwitbird/birdsprite.png";
var targetElems=new Array("img","hr","table","td","div","input","textarea","button","select","ul","ol","li","h1","h2","h3",
"h4","p","code","object","a","b","strong","span");
var twitterAccount = "http://twitter.com/techgyo";var tweetThisText = "Twitter - techGyo http://www.techgyo.com/";tripleflapInit();
</script>
<a id="theBird" href="http://twitter.com/YOUR TWITTER ACCOUNT" target="_blank" style="display: block; position: absolute; width: 64px; height: 64px; background-image: url(http://techgyo.com/wp-content/FlyingTwitbird/birdsprite.png); background-attachment: initial; background-origin: initial; background-clip: initial; background-color: transparent; z-index: 947; left: 0px; top: 587px; background-position: 0px 0px; background-repeat: no-repeat no-repeat; "></a>
<a id="theBirdLtweet" href="http://twitter.com/home?status=Twitter%20-%20techgyo%20http%3A//www.techgyo.com/" target="_blank" title="tweet this" style="position: absolute; background-image: url(http://techgyo.com/wp-content/FlyingTwitbird/birdsprite.png); background-attachment: initial; background-origin: initial; background-clip: initial; background-color: transparent; width: 58px; height: 30px; z-index: 951; left: 49px; top: 583px; display: none; opacity: 0; background-position: -64px 0px; background-repeat: no-repeat no-repeat; "></a>
<a id="theBirdLfollow" href="http://twitter.com/techgyo" target="_blank" title="follow me" style="position: absolute; background-image: url(http://techgyo.com/wp-content/FlyingTwitbird/birdsprite.png); background-attachment: initial; background-origin: initial; background-clip: initial; background-color: transparent; width: 58px; height: 20px; z-index: 952; left: 54px; top: 613px; display: none; opacity: 0; background-position: -64px -30px; background-repeat: no-repeat no-repeat; "></a>
5. Save it now! Easy right to add flying twtter bird in blog?

Thursday, March 3, 2011

How to Set The Location of Read More

Previously, I've posted about How To Change Read More With An Icon / Button. Now, I will posted about how to set the location of read more. Why I posted about how to set the location of read more? Because many bloggers can't set the location of read more. Whereas, the trick is very easy. You just add some script. For the details, you can follow the steps below.

1. Log in to your blogger account
2. Go to Design --> Edit HTML
3. Check in the "Expand Widget Templates" box
4. Find your read more button URL, for example :
<img border="0" src="https://lh4.googleusercontent.com/-IZgq6Z2Kz8M/TXB8F8lMlEI/AAAAAAAAAPA/cfMaqkz24Rc
/s1600/readmore_button.png"/>
5. Then,  if you want to place the button on the right, use this code
<p align="right"><img border="0" src="https://lh4.googleusercontent.com/-IZgq6Z2Kz8M/TXB8F8lMlEI/AAAAAAAAAPA/cfMaqkz24Rc
/s1600/readmore_button.png"/></p>
=> You can change the align with left.
6. Save it now