Sunday, June 26, 2011

Magic Image! Move Image Freely

Hi, friends! Now, we are gonna make a crazy trick. That's Magic Image! Move Image Freely. Freely? Yups... you and your visitors of your blog can move images wherever. Left, right, top, or bottom. It's up to you. Curious? See the DEMO. OK, now if you wanna try Magic Image! Move Image Freely, just follow the steps below.

1. Log in to your blogger icon
2. Go to Design --> Edit HTML
3. Copy the code below, and paste above ]]></b:skin>
.FBT_magic img { cursor: move;}
4. Then, copy the code below and paste above </head>
<script src='http://ajax.googleapis.com/ajax/libs/jquery/1.4/jquery.min.js' type='text/javascript'/>
<script src='http://ajax.googleapis.com/ajax/libs/jqueryui/1.8/jquery-ui.min.js' type='text/javascript'/>
<script type='text/javascript'>
$(document).ready(function() {
$(&quot;div.FBT_magic img&quot;).draggable();
});
</script>
5. Click SAVE TEMPLATE

Now if you wanna use this effect, just use this code
<div class='FBT_magic'><img src='PICTURE-URL'/></div>

OK, That's all friend... Hopefully useful...

Thursday, June 23, 2011

Fastest and Easiest Way to Build Navigation Menu

Hi, Bloggers! Now, we're gonna try novelty. That's the fastest and easiest way to build navigation menu. How? We just use CSS Menu Generator. I think, it's very useful software for the beginners. Btw, why I said the software is easiest and the fastest?
Easiest : Because we will use software, so we won't modify the code one by one
Fastest : The code will be display directly after we set its navigation
This software has 3 basic featres. So, what's the features of CSS Menu Generator?

  • HorizontalMenu
  • Vertical Menu
  • Dropdown Menu

Below is the screenshot of CSS Menu Generator


So, what are you waiting for? Just dowonload this software. Click the link


How to add into blogger? Just:
1. Log in to your blogger account
2. Go to Design --> Page Elements --> Add Gadget
3. Choose "HTML/Java Script"
4. Get the code, and add it
5. Click SAVE

OK, that's all friend. Hopefully useful... ^_^

Friday, June 17, 2011

Slide Out Panel with jQuery and Rounded Corner

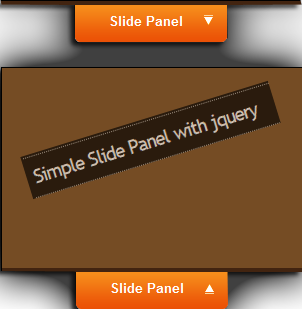
Hoahmm.... Hi, friends! Wait for a new trick? OK, now we will create Slide Out Panel with jQuery and Rounded Corner. The effect is when we click the panel, it will slide out, and show some links or somtehing. Maybe this trick remind us to How To Make Floating Widget. But, if the previous trick doesn't use jQuery. Wanna see the DEMO? Now, if you want to create Slide Out Panel with jQuery and Rounded Corner, just follow the steps below.

1. Log in to your blogger account
2 .Go to Design --> Edit HTML
3. Copy the code below, and paste above ]]></b:skin>

#container {
clear: both;
margin: 0;
padding: 0;
}

#container a{
float: right;
background: #9FC54E;
border: 1px solid #9FC54E;
-moz-border-radius-topright: 20px;
-webkit-border-top-right-radius: 20px;
-moz-border-radius-bottomleft: 20px;
-webkit-border-bottom-left-radius: 20px;
text-decoration: none;
font-size: 16px;
letter-spacing:-1px;
font-family: verdana, helvetica, arial, sans-serif;
color:#fff;
padding: 20px;
font-weight: 700;
}

#container a:hover{
float: right;
background: #a0a0a0;
border: 1px solid #cccccc;
-moz-border-radius-topright: 20px;
-webkit-border-top-right-radius: 20px;
-moz-border-radius-bottomleft: 20px;
-webkit-border-bottom-left-radius: 20px;
text-decoration: none;
font-size: 16px;
letter-spacing:-1px;
font-family: verdana, helvetica, arial, sans-serif;
color:#fff;
padding: 20px;
font-weight: 700;
}

.content {
font-style:normal;
font-family:helvetica, arial, verdana, sans-serif;
color:#ffffff;
background:#333333;
border:1px solid #444444;
-moz-border-radius-topright: 20px;
-webkit-border-top-right-radius: 20px;
-moz-border-radius-bottomleft: 20px;
-webkit-border-bottom-left-radius: 20px;
margin: 30px 0 50px;
padding: 15px 0;
}

.content p {
margin: 10px 0;
padding: 15px 20px;
}

.panel {
position: absolute;
top: 250px;
left: 0;
display: none;
background: #000000;
border:1px solid #111111;
-moz-border-radius-topright: 20px;
-webkit-border-top-right-radius: 20px;
-moz-border-radius-bottomright: 20px;
-webkit-border-bottom-right-radius: 20px;
width: 330px;
height: auto;
padding: 30px 30px 30px 130px;
filter: alpha(opacity=85);
opacity: .85;
}

.panel p{
margin: 0 0 15px 0;
padding: 0;
color: #cccccc;
}

.panel a, .panel a:visited{
margin: 0;
padding: 0;
color: #9FC54E;
text-decoration: none;
border-bottom: 1px solid #9FC54E;
}

.panel a:hover, .panel a:visited:hover{
margin: 0;
padding: 0;
color: #ffffff;
text-decoration: none;
border-bottom: 1px solid #ffffff;
}

a.trigger{
position: absolute;
text-decoration: none;
top: 250px; left: 0;
font-size: 16px;
letter-spacing:-1px;
font-family: verdana, helvetica, arial, sans-serif;
color:#fff;
padding: 20px 40px 20px 15px;
font-weight: 700;
background:#333333 url(https://blogger.googleusercontent.com/img/b/R29vZ2xl/AVvXsEirX7-7stc4O5HJx4K89XxwKfnaaLXdhsxU92BegXhghI8urpintXQMVn57Alsc7JBLvqulfrTzwi8yizvNfFYkFWSLUQN7wWOzDJUaGVQcbVZIwIR5GTyxnFgPoFQ-KNFdw0UqWHnPw-w/s320/plus.png) 85% 55% no-repeat;
border:1px solid #444444;
-moz-border-radius-topright: 20px;
-webkit-border-top-right-radius: 20px;
-moz-border-radius-bottomright: 20px;
-webkit-border-bottom-right-radius: 20px;
-moz-border-radius-bottomleft: 0px;
-webkit-border-bottom-left-radius: 0px;
display: block;
}

a.trigger:hover{
position: absolute;
text-decoration: none;
top: 250px; left: 0;
font-size: 16px;
letter-spacing:-1px;
font-family: verdana, helvetica, arial, sans-serif;
color:#fff;
padding: 20px 40px 20px 20px;
font-weight: 700;
background:#222222 url(https://blogger.googleusercontent.com/img/b/R29vZ2xl/AVvXsEirX7-7stc4O5HJx4K89XxwKfnaaLXdhsxU92BegXhghI8urpintXQMVn57Alsc7JBLvqulfrTzwi8yizvNfFYkFWSLUQN7wWOzDJUaGVQcbVZIwIR5GTyxnFgPoFQ-KNFdw0UqWHnPw-w/s320/plus.png) 85% 55% no-repeat;
border:1px solid #444444;
-moz-border-radius-topright: 20px;
-webkit-border-top-right-radius: 20px;
-moz-border-radius-bottomright: 20px;
-webkit-border-bottom-right-radius: 20px;
-moz-border-radius-bottomleft: 0px;
-webkit-border-bottom-left-radius: 0px;
display: block;
}

a.active.trigger {
background:#222222 url(https://blogger.googleusercontent.com/img/b/R29vZ2xl/AVvXsEiwpXqQR4sfOAUUiKYnF_5iSWjoWyXRxXRZcxHtNFV67CE6szkrfEWxhquC0oQaksrrXd-gU04vSUOLxtvQGo2xxNUhR4TZZCkUjDnLz1d6j1lQvNbQ6A2ZzTfB3DktreBv1GXWidfGJ8Q/s320/minus.png) 85% 55% no-repeat;
}

.columns{
clear: both;
width: 330px;
padding: 0 0 20px 0;
line-height: 22px;
}

.colleft{
float: left;
width: 130px;
line-height: 22px;
}

.colright{
float: right;
width: 130px;
line-height: 22px;
}

ul{
padding: 0;
margin: 0;
list-style-type: none;
}

ul li{
padding: 0;
margin: 0;
list-style-type: none;
}

4. Then copy the code below, and paste above </head>
<script src='http://pelajarandashblogdotblogspotdotcom.googlecode.com/files/jquery-1.3.2.js' type='text/javascript'/>

<script type='text/javascript'>
$(document).ready(function(){
$(&quot;.trigger&quot;).click(function(){
$(&quot;.panel&quot;).toggle(&quot;fast&quot;);
$(this).toggleClass(&quot;active&quot;);
return false;
});
});
</script>
5. Then, click SAVE TEMPLATE
6. Now, go to Page Elements --> Add Gadget, choose "HTML/Java Script"
7. Then, add the code below

<div class="panel">

<h2>Choose the categories:</h2>
<div style="clear:both;"></div>
<div class="columns">
<div class="colleft">

<h3>Full Blog Tricks-1</h3>

<ul>
<li><a href="#" title=" FBT1">FBT1</a></li>
<li><a href="#" title=" FBT2">FBT2</a></li>
<li><a href="#" title=" FBT3">FBT3</a></li>
<li><a href="#" title=" FBT4">FBT4</a></li>
<li><a href="#" title=" FBT5">FBT5</a></li>
</ul>
</div>

<div class="colright">

<h3>Full Blog Tricks-2</h3>

<ul>
<li><a href="#" title=" FBT1">FBT1</a></li>
<li><a href="#" title=" FBT2">FBT2</a></li>
<li><a href="#" title=" FBT3">FBT3</a></li>
<li><a href="#" title=" FBT4">FBT4</a></li>
<li><a href="#" title=" FBT5">FBT5</a></li>
</ul>
</div>
</div>

<div style="clear:both;"></div>
</div>
<a class="trigger" href="#">Find More!</a>

=> Customize first the links
8. Click SAVE

Thursday, June 16, 2011

Glowing Navigation Menu with jQuery for Blogger

Hi guys! Today, we will try to create Glowing Navigation Menu with jQuery for Blogger. Maybe this trick is almost similar with Hide Show Social Bookmarks with Hover. But, I think Glowing Navigation is better. Want to see the DEMO? OK, now if you want to try Glowing Navigation Menu with jQuery for Blogger, just follow the steps below.

1. Log in to your blogger account
2. Go to Design --> Editt HTML
3. Copy the code below, and paste above ]]></b:skin>

.kwicks{height:50px;list-style:none;margin:0;padding:0;position:relative;width:840px;z-index:2
}
.kwicks li{cursor:pointer;display:block;float:left;height:50px;overflow:hidden;padding:0;width:120px;z-index:2}
.kwicks li a{background-image:url(http://4.bp.blogspot.com/-e1c5hdvd0MQ/TbgSHi-7EEI/AAAAAAAAAzs/Y9aTBHEgh84/s1600/menu%2Bjquery%2Bpelajaran%2Bblog.jpg
);background-repeat:no-repeat;cursor:pointer;display:block;height:50px;outline:none;text-indent:-9999px;z-index:2}
#kwick1 a:hover{background-position:0 -50px!important}
#kwick2 a{background-position:-190px 0}
#kwick2 a:hover{background-position:-190px -50px!important}
#kwick3 a{background-position:-380px 0}
#kwick3 a:hover{background-position:-380px -50px!important}
#kwick4 a{background-position:-570px 0}
#kwick4 a:hover{background-position:-570px -50px!important}
#kwick5 a{background-position:-760px 0}
#kwick5 a:hover{background-position:-760px -50px!important}
#kwick6 a{background-position:-950px 0}
#kwick6 a:hover{background-position:-950px -50px!important}
.kwicks li ul a{float:left;width:12em}
.kwicks ul ul{top:auto}
.kwicks li ul ul{left:12em;margin:0 0 0 10px}
.kwicks li:hover ul,#nav li li:hover ul,#nav li li li:hover ul,#nav li li li li:hover ul{display:block
}

4. Then copy the code  below, and paste above </head>
<script src='http://pelajarandashblogdotblogspotdotcom.googlecode.com/files/jquery-1.2.3.js' type='text/javascript'/>
<script src='http://pelajarandashblogdotblogspotdotcom.googlecode.com/files/jquery.kwicks-1.5.1.js' type='text/javascript'/>
<script src='http://pelajarandashblogdotblogspotdotcom.googlecode.com/files/jquery.easing.1.3.js' type='text/javascript'/>
5. Click SAVE TEMPLATE
6. Now, go to Design --> Page Elements --> Add Gadget, choose "HTML/Java Script"
7. After that, add this code
<div class='kwickswrap'>
<ul class='kwicks'>
<li id='kwick1'><a href='#' title='Home'>Home</a></li>
<li id='kwick2'><a href='#' title='Contents'>Blog</a></li>
<li id='kwick3'><a href='#' title='About'>About</a></li>
<li id='kwick4'><a href='#' title='Futures'>Portfolio</a></li>
<li id='kwick5'><a href='#' title='Contact us'>Contact</a></li>
<li id='kwick6'><a href='#' title='Recomended links'>Resource</a></li>
</ul>
</div>
</td>
<script type="text/javascript">
$().ready(function() {
$('.kwicks').kwicks({
max : 190,
duration: 800,
easing: 'easeOutQuint'
});
});
</script>
=> You have to customize the URL first
8. Click SAVE

Saturday, June 11, 2011

Easier and Faster to Edit Blogger Favicon

Hi, friends! Did you know? Blogger just release a new feature. What is that? Favicon Editor! Yups.. the function is for Easier and Faster to Edit Blogger Favicon. I think it's very nice feature. We just need little steps to edit our blog favicon. But, where is Favicon Editor place? You can find on Design --> Page Elements.


Then, how to add the favicon? You just click "Edit" on Favicon menu. The, you can upload you favicon file (a file with .ico). Just share some tips, you can get a file with .ico in http://www.favicongenerator.com/. Firstly, upload you picture, and FaviconGenerator will be generate into .ico. So, we just waiting what is Blogger next update...

Thursday, June 9, 2011

Show Random Posts with Thumbnail Display

Hi, Bloggers! Are you ready to learn a new tricks? OK, now I'm gonna share you about Show Random Posts with Thumbnail. Maybe, this trick almost similar with previous trick, How to Add Labels with Thumbnail. But, in these trick, you just need little code. Need a DEMO? You can see the demo at the bottom of my blog. Now, if you want to add Show Random Posts with Thumbnail Display into your blog, just follow the steps below.

1. Log in to your blogger account
2. Go to Design --> Page Elements --> Add Gadget
3. Then, add the code below

<style text-type="CSS">
img.label_thumb {
float:left;
padding:3px;
background:#CCC;
border:1px solid #A4A4A4;
width:100px;
height:75px;
margin-right:10px;
margin-top:10px }

img.label_thumb:hover {
opacity:0.8;
filter:alpha(opacity=80);
-moz-opacity:0.80;
-khtml-opacity:0.8 }
</style>

<script type='text/javascript'>
//<![CDATA[
function labelthumbs(json){document.write('<div>');for(var i=0;i<numposts;i++){var entry=json.feed.entry[i];var posttitle=entry.title.$t;var posturl;if(i==json.feed.entry.length)break;for(var k=0;k<entry.link.length;k++){if(entry.link[k].rel=='replies'&&entry.link[k].type=='text/html'){var commenttext=entry.link[k].title;var commenturl=entry.link[k].href;}
if(entry.link[k].rel=='alternate'){posturl=entry.link[k].href;break;}}
var thumburl;try{thumburl=entry.media$thumbnail.url;}catch(error)
{s=entry.content.$t;a=s.indexOf("<img");b=s.indexOf("src=\"",a);c=s.indexOf("\"",b+5);d=s.substr(b+5,c-b-5);if((a!=-1)&&(b!=-1)&&(c!=-1)&&(d!="")){thumburl=d;}
else thumburl='';}
document.write('<a href="'+posturl+'" title="'+posttitle+'"><img class="label_thumb" src="'+thumburl+'"/></a>');
if(i!=(numposts-1))
document.write('');}
document.write('</div>');}
//]]>
</script>

<script type='text/javascript'>var numposts = 4;</script>
<script type="text/javascript" src="/feeds/posts/default/-/Hacks?orderby=updated&alt=json-in-script&callback=labelthumbs"></script>

=> The blue code is the number of the post that you want to show
=> The green code is the name of the blog label (The alphabet must be same)

4. Then, click SAVE TEMPLATE

Saturday, June 4, 2011

White Navigation with Shadow and Rounded Corner

Hi, bloggers! Now, I'm gonna post about White Navigation with Shadow and Rounded Corner. This navigation is difference with other navigation. Because this navigation is floating. This navigation also has some effect, they are Shadow and Rounded Corner. Want see the DEMO? Now, if you want to add White Navigation with Shadow and Rounded Corner, just follow the steps below.

1. Log in to yur blogger account
2. Go to Design --> Edit HTML
3. Copy the code below, and paste above </body>
<!-- zFPmenu START -->
<div id='zfpm_div' style='display:none;'>
<div id='zfpm_upperBox'>

Add ads, text message, etc.

</div>
<ul id='zfpm_ul'>
<!-- Your menus start -->
<li><a href=''>YOUR MENU-1</a></li>
<li class='dir'><a href=''>YOUR MENU 2 (containing submenu)</a>
   <ul>
      <li class='dir'><a href=''>YOUR SUBMENU 2.1 (containing sub-submenu)</a>
         <ul>
            <li><a href=''>YOUR SUB-SUBMENU 2.1.1</a></li>
            <li><a href=''>YOUR SUB-SUBMENU 2.1.2</a></li>
         </ul>
      </li>
      <li><a href=''>YOUR SUBMENU 2.2</a></li>
      <li><a href=''>YOUR SUBMENU 2.3</a></li>
   </ul>
</li>
<!-- Your menus end -->
</ul></div>
<script type='text/javascript'>
var zfpm_colorTheme = &#39;light&#39;
var zfpm_shareBox = &#39;no&#39;;
</script>
<script src='http://ajax.googleapis.com/ajax/libs/jquery/1.4.2/jquery.min.js' type='text/javascript'/>
<script src='http://zfpmenu.googlecode.com/svn/trunk/js/zfpmenu.js' type='text/javascript'/>
<!-- zFPmenu END -->
=> Customize first the code
4. Click SAVE TEMPLATE

Google Plus One for Blogger

Google has releases a new application! Yups, that's Google Plus One (+1). I've tried on my blog. You can see on this page. By clicking Google +1 button, it's similar you speak "This is cool" or "You have to see it". Maybe +1 that you gave can help your friends, people, or maybe your blogging mates on internet find the best stuff when they search. Now, how to add Google Plus One for Blogger? It's very simple, just follow the steps below.

Choose the model of Google Plus One button

<script type="text/javascript" src="http://apis.google.com/js/plusone.js">
{lang: 'en-US'}</script>
<div><g:plusone size="standard" expr:href="data:post.url"/></div>


<script type="text/javascript" src="http://apis.google.com/js/plusone.js">
{lang: 'en-US'}</script>
<div><g:plusone size="tall" expr:href="data:post.url"/></div>

Add into your blog
1. Go to Design --> Page Elements --> Add Gadget
2. Choose "HTML/Java Script"
3. Add one of Google Plus button code for Blogger.
4. Click SAVE

Or, maybe you want to add on every blog posts? Follow the steps below.
1. Go to Design --> Edit HTML
2. Check in the "Expand Widget Templates" box
3. Add one of Google Plus button code for Blogger above <data:post.body/> (choose the second if you're using Read More")
4. Click SAVE TEMPLATES

So, easy right, to add Google Plus One for Blogger???