Saturday, June 4, 2011

Google Plus One for Blogger

Google has releases a new application! Yups, that's Google Plus One (+1). I've tried on my blog. You can see on this page. By clicking Google +1 button, it's similar you speak "This is cool" or "You have to see it". Maybe +1 that you gave can help your friends, people, or maybe your blogging mates on internet find the best stuff when they search. Now, how to add Google Plus One for Blogger? It's very simple, just follow the steps below.

Choose the model of Google Plus One button

<script type="text/javascript" src="http://apis.google.com/js/plusone.js">
{lang: 'en-US'}</script>
<div><g:plusone size="standard" expr:href="data:post.url"/></div>


<script type="text/javascript" src="http://apis.google.com/js/plusone.js">
{lang: 'en-US'}</script>
<div><g:plusone size="tall" expr:href="data:post.url"/></div>

Add into your blog
1. Go to Design --> Page Elements --> Add Gadget
2. Choose "HTML/Java Script"
3. Add one of Google Plus button code for Blogger.
4. Click SAVE

Or, maybe you want to add on every blog posts? Follow the steps below.
1. Go to Design --> Edit HTML
2. Check in the "Expand Widget Templates" box
3. Add one of Google Plus button code for Blogger above <data:post.body/> (choose the second if you're using Read More")
4. Click SAVE TEMPLATES

So, easy right, to add Google Plus One for Blogger???

Tuesday, May 31, 2011

Simple Fog Effect for Blogger Image

Maybe you are boring with the image on your blog. Because the image does't has any effect. Now we will add some effect to your image. That's Simple Fog Effect for Blogger Image. Usually fog effect can be called with "Blur". The effect is when you put your cursor on the image, the image will be foggy. See the demo

blogger icon


Nice right? OK, if you want to try Simple Fog Effect for Blogger Image, just follow the steps below.

1. Log in to your blogger icon
2. Go to Design --> Edit HTML
3. Copy the code below, and paste above ]]></b:skin>
.FBT-blur img {filter:alpha(opacity=100); -moz-opacity:1.0; opacity:1.0; border:0;}
.FBT-blur:hover img {filter:alpha(opacity=30); -moz-opacity:0.3; opacity:0.3;border:0;}
4. Click SAVE TEMPLATE

Then to "call" the effect just add some code, so the image code will be like this
<a class="FBT-blur" href="http://full-tricks.blogspot.com/"><img alt="blogger icon" border="0" src="http://3.bp.blogspot.com/-a0b5TxNurp8/TeW6QAGDFVI/AAAAAAAAAaU/MBH8_54AreY/s200/fullblogtricks-blogger-icon.jpg" /></a>

So easy right?

Monday, May 30, 2011

Full Blog Tricks is Ready for Mobile

As you know, many of people have started using mobile. So, it's not impossible for people to open our blog by their phone. And maybe you think, the appearance on mobile is bad. But throw away your mind, the appearance on mobile is clean and ease. Its just contains some lines. One page contains 5 post (shorten). OK, just see the DEMO. Looks nice right? The trick s very very easy... You just follow the tricks below.

Add this code beside your link
?m=1
So, the link will be like this
http://full-tricks.blogspot.com/?m=1

OK, that's all friend... Very easy right. So, Full Blog Tricks is Ready for Mobile now. Hopefully useful... ^_^

Saturday, May 28, 2011

Create Curved Objects on Blog

Have you see a curved object on my blog? Like this...
Full Blog Tricks
Above is one of the variations of curved objects or can be called "BORDER-RADIUS". With border-radius, our blog will look flexible. Unfortunately, border-radius can't support on Internet Explore. Now, we will learn and try to create curved objects on blog. The curved objects are separated by the browser.

Mozilla Firefox
<div style="background-color:#ccc; -moz-border-radius:5px; border:1px solid #000; padding:10px;">FULL BLOG TRICKS</div>

<div style="background-color:#ccc; -moz-border-radius-topleft:10px; -moz-border-radius-topright:10px; border:1px solid #000; padding:10px;">FULL BLOG TRICKS</div>

<div style="background-color:#F5F6CE; -moz-border-radius-topright:30px; -moz-border-radius-bottomright:30px; border:5px solid #000; padding:10px;">FULL BLOG TRICKS</div>

Safari
<div style="background-color:#A9D0F5; -webkit-border-top-left-radius:30px; -webkit-border-bottom-right-radius:30px; border:5px solid #38610B; padding:10px;">FULL BLOG TRICKS</div>

<div style="background-color:#F5D0A9; -webkit-border-top-left-radius:50px; -webkit-border-top-right-radius:50px; border:5px solid #38610B; padding:10px;">FULL BLOG TRICKS</div>

Opera 10.5
<div style="background-color:#F5F6CE; border-radius:30px; border:5px solid #38610B; padding:10px;">FULL BLOG TRICKS</div>

OK, that's all friend. Hopefully useful...

Friday, May 27, 2011

Meteor Shower on My Blog!!!

Now, we will try to make an effect. That's Meteor Shower on My Blog. This effect is very interesting. When you open your blog (has added this effect) you blog will be get meteor shower. Very nice right? OK, now if you want to add meteor shower on your blog, just follow the steps below. Want to see the DEMO?

1. Log in to your blogger account
2. Go to Design --> Page Elements --> Add Gadget
3. Choose "HTML/Java Script"
4. Then, add the code below
<script language="javascript">
nd_mode="meteor";
nd_sound="on";
nd_vAlign="bottom";
nd_hAlign="right";
nd_vMargin="10";
nd_hMargin="10";
nd_target="_top";
</script>
<script language="javascript" src="http://www.netdisaster.com/js/mynd.js">
</script>
5. Click SAVE

Floating Social Bookmarks with Mouseover

Now, I will post about Floating Social Bookmarks with Mouseover. You have seen many kinds of Social Bookmarks style. There is floating, under the post, or maybe on sidebar. So, we will add the floating Social Bookmarks. Just see the DEMO. Interested? Follow the step below, to add into your blog.

1. Log in to your blogger account
2. Go to Design --> Page Elements --> Add Gadget
3. Choose "HTML/Java Script"

<style>
ul#navigation {
position: fixed;
margin: 0px;
padding: 0px;
top: 0px;
right: 0px;
list-style: none;
z-index:999999;
width:721px;
}
ul#navigation li {
width: 103px;
display:inline;
float:left;
border:0;
}
ul#navigation li a {
display: block;
float:left;
margin-top: -2px;
width: 100px;
height: 25px;
background-color:#eeeeee;
background-repeat:no-repeat;
background-position:50% 10px;
border:1px solid #BDDCEF;
-moz-border-radius:0px 0px 10px 10px;
-webkit-border-bottom-right-radius: 10px;
-webkit-border-bottom-left-radius: 10px;
-khtml-border-bottom-right-radius: 10px;
-khtml-border-bottom-left-radius: 10px;
text-decoration:none;
text-align:center;
padding-top:80px;
opacity: 0.96;
filter:progid:DXImageTransform.Microsoft.Alpha(opacity=70);
}
ul#navigation li a:hover{
background-color:#CAE3F2;
}
ul#navigation li a span{
letter-spacing:2px;
font-size:11px;
color:#60ACD8;
font-family:trebuchet-ms, arial, tahoma, Sans-Serif;
font-weight:bold;
text-shadow: 0 -1px 1px #fff;
}
ul#navigation .rss a{
background-image: url(https://blogger.googleusercontent.com/img/b/R29vZ2xl/AVvXsEg6GF0ggLUIWc1jP0RdQbi6yiOsSo0j1itWz7CaAb7Lms24Xq8pB6gx8Za0ax_EL-gfl0yCbrZJsvCYOJj7KunDS1GszwGYD4dhtMj7040z4-zDqJ7nvSHszAdxK0TA0cqaVG1_vGPOek9z/s400/rss_64x64.png);
}
ul#navigation .facebook a {
background-image: url(https://blogger.googleusercontent.com/img/b/R29vZ2xl/AVvXsEgoLcGomG2R5-e-BC6Tsy7WuHZuQFcLAjjc0YJn9DmUd3YyQWbT7Sqaud4t8ubScjWUfAjL9saMxN5yaB64O_TruMK076HW7htAglx-XXquw4_kR4SqaoeuUFOjI67f878muegAqrDPnGbb/s400/facebook_64x64.png);
}
ul#navigation .twitter a {
background-image: url(https://blogger.googleusercontent.com/img/b/R29vZ2xl/AVvXsEi4GSzFhU-4pB_lFMSogppJjSdKrmDLaazBpY7_ysc4tKI8UHBxF3BVbc7suuKCMBUxfDvv3NgSfjOzrK86PTko-CMg0RrgXuSEETMIYcsTCG4jGMUnQszCFRPmOTFr79ly7BDcHJTFa4j6/s400/twitter_64x64.png);
}
ul#navigation .googlebookmarks a {
background-image: url(https://blogger.googleusercontent.com/img/b/R29vZ2xl/AVvXsEi4hL0E9irtxRvS5uPXL1N_RemZXAzT5j3Z8gM2O6V3gUtwPg0kALGS2KdkC83GLjPx7oFyXOOsJgOUT_DVabvUo4IiTdOeEp2R0crT0s8KEn6uLPPg2qVkiA-r-NT2861McqPwlfBIhyphenhyphenGf/s400/google_64x64.png);
}
ul#navigation .e-mail a {
background-image: url(https://blogger.googleusercontent.com/img/b/R29vZ2xl/AVvXsEhg8sOqEwBOBRHaQa2JTpaOd4aZP41rTCFTGr-YOl271n_05nh1uruWnTk48X_al_9SPLYFxeXThHZOYtnMtFVbE4Vls2ewyTvuWEfPp1-78cCAi4V07_9dV_5fZub0qv0Si-yGdByd6zyU/s400/yahoo_64x64.png);
}
</style>

<script src="http://jqueryjs.googlecode.com/files/jquery-1.3.2.js" type="text/javascript">
</script>
<script type="text/javascript">
$(function() {
var d=300;
$('#navigation a').each(function(){
$(this).stop().animate({
'marginTop':'-80px'
},d+=150);
});

$('#navigation > li').hover(
function () {
$('a',$(this)).stop().animate({
'marginTop':'-2px'
},200);
},
function () {
$('a',$(this)).stop().animate({
'marginTop':'-80px'
},200);
}
);
});
</script>

<ul id="navigation">
<li class="rss"><a href="http://YOUR-BLOG.blogspot.com/atom.xml">RSS Feed</a></li>
<li class="facebook"><a href="FACEBOK-PROFILE">Facebook</a></li>
<li class="twitter"><a href="TWITTER-ACCOUNT">Twitter</a></li>
<li class="googlebookmarks"><a href="https://www.google.com/bookmarks/">Google</a></li>
<li class="e-mail"><a href="YAHOO!-ACCOUNT">Yahoo!</a></li>
</ul>


4. Then, add the code below
5. Click SAVE TEMPLATE

Thursday, May 26, 2011

1, 2 Award for Full Blog Tricks

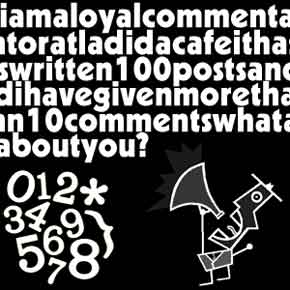
Hmmmm.... Didn't feel has been more than 6 months, this blog is created. We have posted more than 100 blogger tricks, hacks, and widgets. Even SEO tips. There have been many comments to Full Blog Tricks. Thank you to all of commentators. Their comments are very useful. Has become a habbit of blogger to give award to other blog. And there are some blog which gave us an award. This is 1, 2 Award for Full Blog Tricks. They are:

Best Friend Award
From: Acernoval


Top Commentator Award


Once again, thank you for all Full Blog Tricks readers. Without you, We are nothing....

Saturday, May 21, 2011

Hide Show Social Bookmarks with Hover

Hi, friends! How are you? Now we gonna try to create Hide Show Social Bookmarks with Hover. This Social Bookmarks have very nice effect. When we put our cursor, the social bookmarks will be slide and show the hidden-text. This is the picture
Need a DEMO? Now, if you want to try hide show social bookmarks for your blog, just follow the steps below.

1. Log in to your blogger account
2. Go to Design --> Page Elements --> Add Gadget
3. Choose "HTML/Java Script"
4. Then add the code below, don't forget to customize the links

<div id="Layer3">
<ul id="menu">
<li>
<a href="#nogo"><img src="http://www.bbcaudiobooksamerica.com/Portals/0/delicious_48.png" alt="Delicious" width="60" height="60" title="Delicious" />
<span><br />
<b class="h2">Delicious</b><br />
Add to delicious
</span>
</a>
</li>
<li>
<a href="#nogo"><img src="http://www.bbcaudiobooksamerica.com/Portals/0/twitter_icons_48.png" alt="Twitter" width="60" height="60" title="Twitter" />
<span>
<br />
<b class="h2">Twitter</b><br />
Retweet the Article
</span>
</a>
</li>
<li>
<a href="#nogo"><img src="http://twitter.richardebyrd.com/xhtml/assets/images/social/mixx_logo_48.png" alt="Mixx" width="60" height="60" title="Mixx" />
<span><br />
<b class="h2">Mixx</b><br />
&nbsp Mixx it
</span>
</a>
</li>
<li>
<a href="#nogo"><img src="http://twitter.richardebyrd.com/xhtml/assets/images/social/rss-icon.png" alt="RSS" width="60" height="60" title="RSS" />
<span><br />
<b class="h2">Dreamcss </b><br />
Subscribe Us
</span>
</a>
</li>
<li>
<a href="#nogo">
<img src="http://twitter.richardebyrd.com/xhtml/assets/images/social/Google.png" alt="Google" width="60" height="60" title="Google" />
<span><br />
<b class="h2">Google</b><br />
Bookmark the Article
</span>
</a>
</li>
<li>
<a href="#nogo"><img src="http://www.bbcaudiobooksamerica.com/Portals/0/facebook_48.png" alt="Facebook" width="60" height="60" title="Facebook" />
<span><br />
<b class="h2">Facebook</b><br />
Add to Facebook
</span>
</a>
</li>
<li>
<a href="#nogo"><img src="http://twitter.richardebyrd.com/xhtml/assets/images/social/stumble-upon.png" alt="Stumble Upon" width="60" height="60" title="Stumble Upon" />
<span><br />
<b class="h2">Stumble Upon </b><br />
&nbsp Review or thumb-up
</span>
</a>
</li>
</ul>
</div>
<style text-type="CSS">
#menu {
margin:0;
padding:0;
width: 50em;
height: 4.5em;
overflow:hidden;
}
#menu li {
display:inline;
list-style-type:none;
}
#menu li a {
display:block;
float:left;
text-decoration:none;
margin:0;
}
#menu li a img {
opacity:0.7;
margin:0.5em;
border:0;
float:left;
}
#menu li a span {
display:none;
}
#menu li a:hover {
background:transparent;
}
#menu li a:hover span {
width:10em;
color:#aaa;
display:block;
cursor:pointer;
float:left;
}
#menu .h2 {
margin:0 5px;
padding:0;
color:#fc0;
font-variant:small-caps;
font-size:1.25em;
border:0;
}
</style>

5. Click SAVE TEMPLATE

Friday, May 20, 2011

Add Blogger Sign In Form on Blog

All Bloggers that use blogspot as the hosting, must be sign in first in blogspot to go to their account. They must go to Blogger. Then they enter the email and password, and finally they can access their account. But, have you think "I wanna add blogger sign in form on blog..."? But, how? You just follow the steps on these trick. Want to see the DEMO? OK, now if you want to add blogger sign in form on your blog, just follow the steps below.

1. Log in to your blogger account
2. Go to Design --> Page Elements --> Add Gadget
3. Choose "HTML/Java Script"
4. Then, add the code below

<div style="border:1px solid #C3D9FF;">
<form id="gaia_loginform" action="https://www.google.com/accounts/ServiceLoginAuth" method="post" onsubmit="return(gaia_onLoginSubmit());">
<div id="gaia_loginbox">
<table class="form-noindent" cellspacing="3" cellpadding="5" width="100%" border="0">
<tr>
<td valign="top" style="text-align:center" nowrap="nowrap" bgcolor="#e8eefa">
<input type="hidden" name="ltmpl" value="start" />
<div class="loginBox">
<table id="gaia_table" align="center" border="0" cellpadding="1" cellspacing="0">
<tr>
<td colspan="2" align="center">
<font size="-1">Sign in with your</font>
<table>
<tr>
<td valign="top">
<img src="https://www.google.com/accounts/google_transparent.gif" alt="Google" />
</td>
<td valign="middle">
<font size="+0"><b>Account</b></font>
</td>
</tr>
</table>
</td>
</tr>
<tr>
<td colspan="2" align="center">
</td>
</tr>
<tr id="email-row">
<td nowrap="nowrap">
<div align="right">
<span class="gaia le lbl">Email:</span>
</div>
</td>
<td>
<input type="hidden" name="continue" id="continue" value="https://www.blogger.com/loginz?d=http%3A%2F%2Fwww.blogger.com%2Fhome&a=ADD_SERVICE_FLAG" />
<input type="hidden" name="service" id="service" value="blogger" />
<input type="hidden" name="naui" id="naui" value="8" />
<input type="hidden" name="fpui" id="fpui" value="2" />
<input type="hidden" name="skipvpage" id="skipvpage" value="true" />
<input type="hidden" name="rm" id="rm" value="false" />
<input type="hidden" name="dsh" id="dsh" value="-5001523091454835929" />
<input type="hidden" name="ltmpl" id="ltmpl" value="start" />
<input type="hidden" name="alwf" id="alwf" value="true" />
<input type="hidden" name="alinsu" id="alinsu" value="0" />
<input type="hidden" name="ltmpl" id="ltmpl" value="start" />
<input type="hidden" name="timeStmp" id="timeStmp" value=''/>
<input type="hidden" name="secTok" id="secTok" value=''/>
<input type="hidden" name="GALX" value="EmaSfmXjlk8" />
<input type="text" name="Email" id="Email" size="18" value="" class='gaia le val' />
</td>
</tr>
<tr>
<td></td>
<td align="left">
<div style="color: #666666; font-size: 75%;">ex: pat@example.com</div>
</td>
</tr>
<tr id="password-row" class="enabled">
<td align="right" nowrap="nowrap">
<span class="gaia le lbl">Password:</span>
</td>
<td>
<input type="password" name="Passwd" id="Passwd" size="18" class="gaia le val" />
</td>
</tr>
<tr>
<td> </td>
<td align="left">
</td>
</tr>
<tr id="rememberme-row" class="enabled">
<td align="right" valign="top">
<input type="checkbox" name="PersistentCookie" id="PersistentCookie" value="yes" checked='checked' />
<input type="hidden" name='rmshown' value="1" />
</td>
<td>
<label for="PersistentCookie" id="PersistentCookieLabel" class="gaia le rem">Stay signed in</label>
</td>
</tr>
<tr>
<td>
</td>
<td align="left">
<input type="submit" class="gaia le button" name="signIn" id="signIn" value="Sign in" />
</td>
</tr>
<tr id="ga-fprow">
<td colspan="2" height="33.0" class="gaia le fpwd" align="center" valign="bottom">
<a href="https://www.blogger.com/forgot.g" target=_top>Can't access your account?</a>
</td>
</tr>
</table>
</div>
</td>
</tr>
</table>
</div>
<input type="hidden" name="asts" id="asts" value="" />
</form>
<script>
var gaia_loginForm;
if (document.getElementById) {
gaia_loginForm = document.getElementById("gaia_loginform");
} else if (window.gaia_loginform) {
gaia_loginForm = window.gaia_loginform;
}
var gaia_emailHasKeypress = false;
if (gaia_loginForm && gaia_loginForm.Email) {
gaia_loginForm.Email.onkeypress = function() {
gaia_emailHasKeypress = true;
}
}
function gaia_setFocus() {
if (gaia_loginForm) {
if (gaia_loginForm.Email && !gaia_loginForm.Email.value) {
gaia_loginForm.Email.focus();
} else if (gaia_loginForm.Passwd && !gaia_emailHasKeypress) {
gaia_loginForm.Passwd.focus();
}
}
}
gaia_setFocus();
</script>
<form id="gaia_universallogin" action="https://www.google.com/accounts/ServiceLoginAuth" method="post" onsubmit="return(gaia_onLoginSubmit());">
<input type="hidden" name="continue" id="continue" value="https://www.blogger.com/loginz?d=http%3A%2F%2Fwww.blogger.com%2Fhome&a=ADD_SERVICE_FLAG" />
<input type="hidden" name="service" id="service" value="blogger" />
<input type="hidden" name="naui" id="naui" value="8" />
<input type="hidden" name="fpui" id="fpui" value="2" />
<input type="hidden" name="skipvpage" id="skipvpage" value="true" />
<input type="hidden" name="rm" id="rm" value="false" />
<input type="hidden" name="dsh" id="dsh" value="-5001523091454835929" />
<input type="hidden" name="ltmpl" id="ltmpl" value="start" />
<input type="hidden" name="alwf" id="alwf" value="true" />
<input type="hidden" name="alinsu" id="alinsu" value="0" />
<input type="hidden" name="ltmpl" id="ltmpl" value="start" />
</form>
</div>

5. Click SAVE TEMPLATE

Thursday, May 19, 2011

Moving Down Background for Blogger

Now, I will share about Moving Down Background for Blogger. This trick is very unique. Why? Because the blog background will move without scrolling. So I called this "Unique Background". Want to see the DEMO? OK, now if you want to try Moving Down Background for Blogger, just follow the steps below.

1. Log in to your blogger account
2. Go to Design --> Edit HTML
3. Copy the code below, and paste above </head>

<script src='http://ajax.googleapis.com/ajax/libs/jquery/1.3.2/jquery.min.js?ver=1.3.2' type='text/javascript'></script>
<script type='text/javascript'>
//<![CDATA[
$(function(){

// ***
// Scrolling background
// ***

// height of background image in pixels
var backgroundheight = 4000;

// get the current minute/hour of the day
var now = new Date();
var hour = now.getHours();
var minute = now.getMinutes();

// work out how far through the day we are as a percentage - e.g. 6pm = 75%
var hourpercent = hour / 24 * 100;
var minutepercent = minute / 30 / 24 * 100;
var percentofday = Math.round(hourpercent + minutepercent);

// calculate which pixel row to start graphic from based on how far through the day we are
var offset = backgroundheight / 100 * percentofday;

// graphic starts at approx 6am, so adjust offset by 1/4
var offset = offset - (backgroundheight / 1);

function scrollbackground() {
// decrease the offset by 1, or if its less than 1 increase it by the background height minus 1
offset = (offset < 1) ? offset + (backgroundheight - 1) : offset - 1;
// apply the background position
$('body').css("background-position", "50% " + offset + "px");
// call self to continue animation
setTimeout(function() {
scrollbackground();
}, 70
);
}

// Start the animation
scrollbackground();
});
//]]>
</script>

4. Then try to find
body {
just copy this code and put under body {
background:url(http://lh6.ggpht.com/_dfnTVAxeWMI/SrFV2ZgHUvI/AAAAAAAACU8
/yP_7acjnv5U/bgscroll.jpg);
5. Click SAVE TEMPLATE